Case Study: Audio Visualization View For Android by Cleveroad
Updated 24 Mar 2023
6 Min
11615 Views
The spring is here. By tradition, everyone waits for some warmth and bright colors. Of course, it gives some inspiration and in the most effective way reflects on the work of our team. We want to create a beautiful and useful things. So please welcome our new product. Today we want to present you a CRAudioVisualizationView library.
What is CRAudioVisualizationView?
This library is created for animated visualization of played audio files. It was designed for the Android platform. And it can be implemented for any version of this operating system starting from Android 3.0.
In fact, it is the equalizer, which is animated with the track playing on your device.
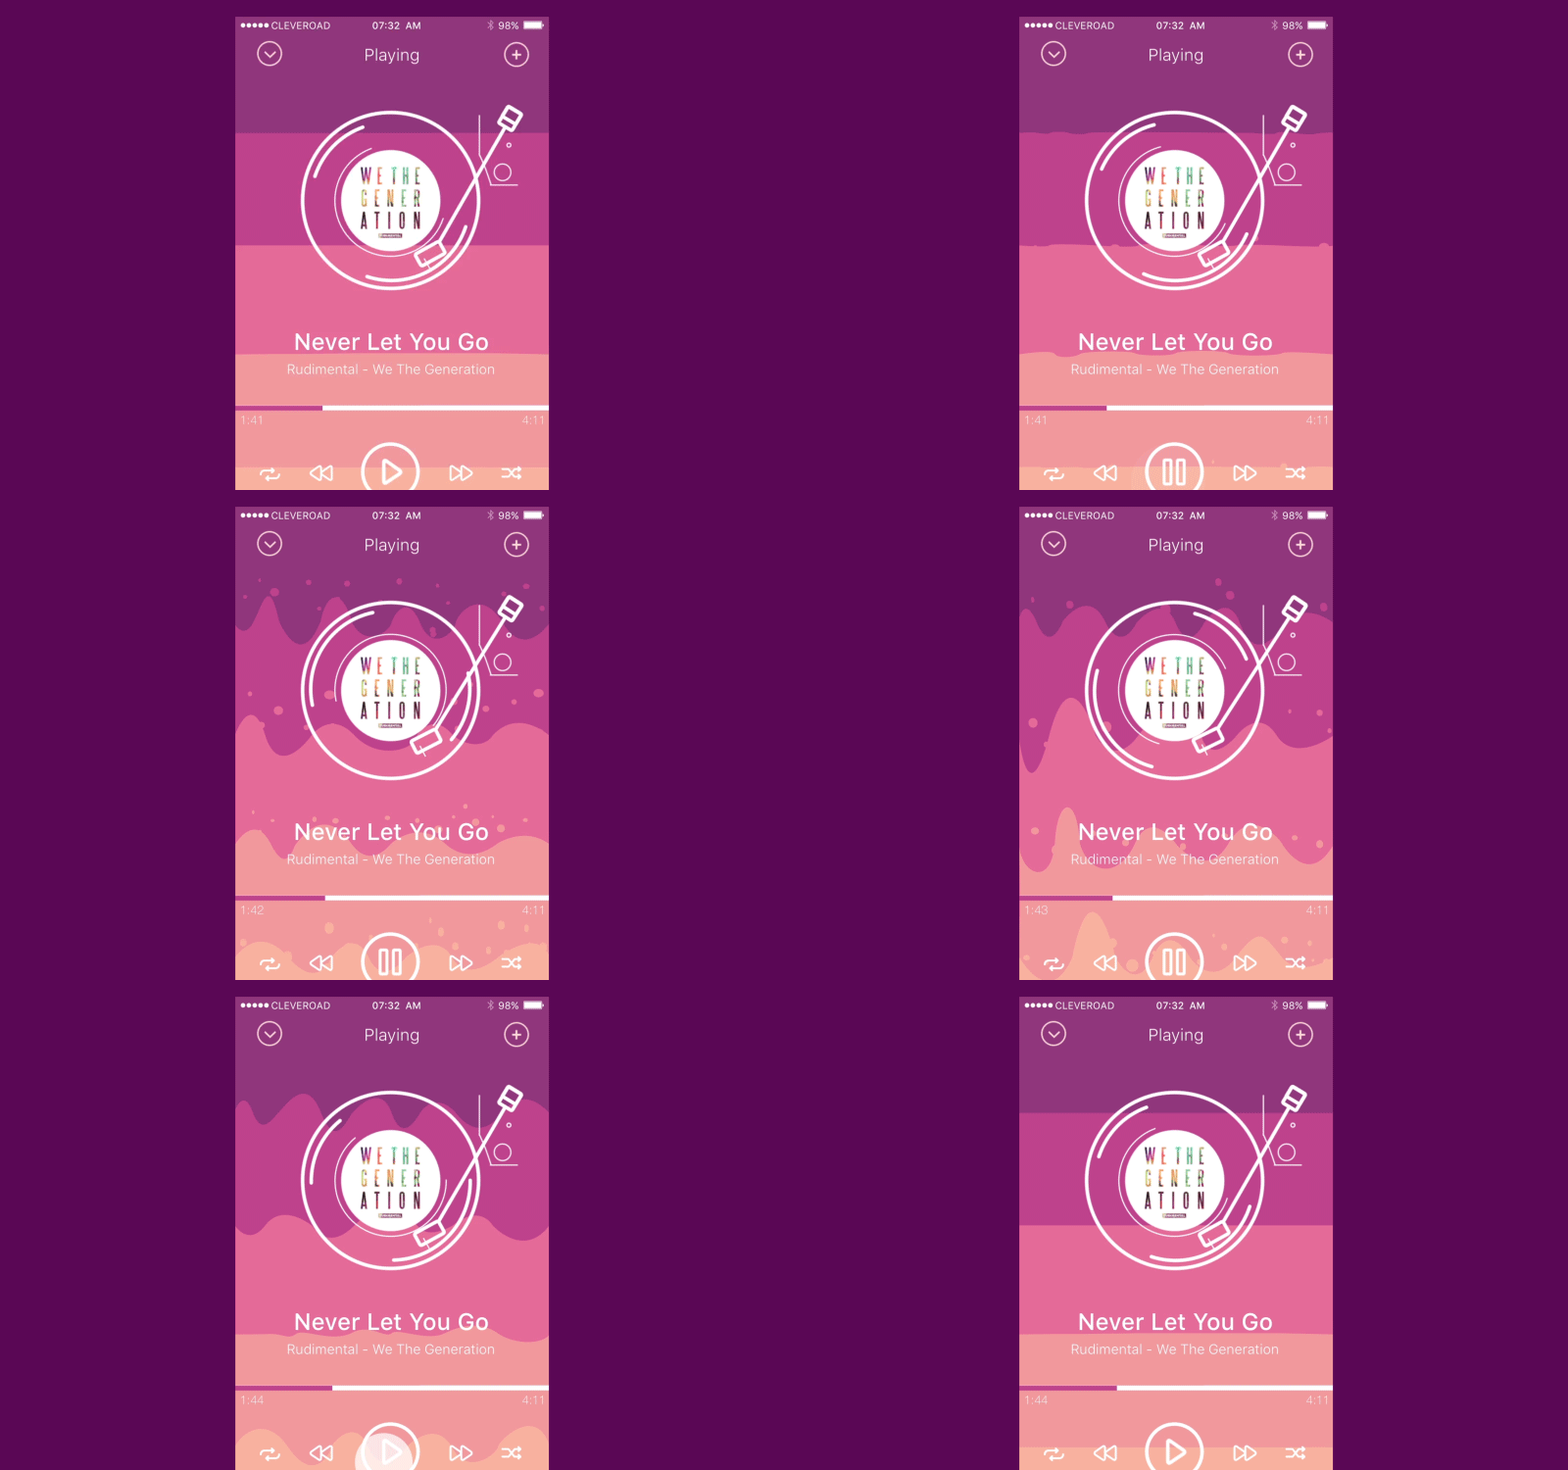
We have turned the usual equalizer into something quite extraordinary. Our designers have chosen the bright colors and juicy shades to make it nice looking.
The animation is made in the form of waves of different colors that move with the beat of your favorite rhythms. And when the music stops, they calm down. And our waves generate the cute splashing bubbles.

There are three ways of using this library:
- Visualizer (for played music);
- Speech Recognizer (Speech Recognition uses this class to recognize the sound, so when a user stops speaking recognizer and visualization turns off);
- Audio Recording (uses recording from a microphone).
Creating the library
Usually, the process of creating of any product is divided into several stages. Here are this global three stages:
- the idea emergence;
- discussion and sharpen;
- creation of the product.
1. The idea emergence. The idea of creating a cool unusual audio visualizer has been up in the air for a long time. Finally, it was decided to work on this project when this idea gets the shape of a ready-made solution.
There was the thought to create a fusion of vintage motifs and modern technologies. Thus, we have decided to combine a vinyl player and a modern equalizer. The main focus is on the equalizer.
2. Discussion and sharpen. After it was decided to work in this direction, our team of designers was to develop a concept of the equalizer. We wanted to create something bright, but at the same time familiar and cozy.
We have embodied the coziness in the performance of the equalizer. What is your first association with the word "equalizer" (after the 'music', of course)? That's right, it is the 'waves' (see, we are on the same wavelength :). Therefore, our team decided to implement our CRAudioVisualizationView in this direction.
Subsequently, there was an idea to make the effect more intense. And we've added to our waves real splashes. Because of this, they have got a completely new look.
Brightness and comfort are mixed in the color layout of the equalizer. Waves are made with the colors of the evening sun and are associated with a warm summer sunset near the ocean. At this moment you feel warm and comfortable, listening to your favorite track, and in front of you is nature with all it's rave of colors. It is this precisely the effect we wanted.
3. Creation of the product. Since the equalizer represents the frequency analyzing, in the design the analyzing of colors was used.
For the design, we've chosen the After Effects CC application.
In the effect appearance, the basses were separated into high, medium and low levels. The frequency analyzing of waves was calculated by physical formulas.
How to implement the library?
To use CRAudioVisualizationView in your project, you should perform a few simple steps.
- To start working with the library, first of all, you need to add the dependency in build.gradle file:
dependencies { compile 'com.cleveroad:audiovisualization:0.9.1' }- Audio visualization uses OpenGL ES 2.0 to create waves. In order to make it work properly, you need to register the implement this line of code:
<uses-feature android:glEsVersion="0x00020000" android:required="true" />- Next, you need to use VisualizerDbmHandler. All functionality of this handler built upon Visualizer object. Therefore, you will need to add these permissions to your code:
<uses-permission android:name="android.permission.RECORD_AUDIO"/>
<uses-permission android:name="android.permission.MODIFY_AUDIO_SETTINGS"/>- Use SpeechRecognizerDbmHandler. The work of this handler is built on SpeechRecognizer. So you need to add the following permission.
<uses-permission android:name="android.permission.RECORD_AUDIO"/>Be careful when using GLAudioVisualizationView. You must take into account all aspects related to the new Android M permissions.
- There are two ways to include GLAudioVisualizationView in your layout:
- directly in XML layout file;
- using builder in Java code.
XML
<com.cleveroad.audiovisualization.GLAudioVisualizationView
        xmlns:android="http://schemas.android.com/apk/res/android"
        xmlns:app="http://schemas.android.com/apk/res-auto"
        android:id="@+id/visualizer_view"
        android:layout_width="match_parent"
        android:layout_height="match_parent"
        app:av_bubble_size="@dimen/bubble_size"
        app:av_randomize_bubble_size="true"
        app:av_wave_height="@dimen/wave_height"
        app:av_footer_height="@dimen/footer_height"
        app:av_waves_count="7"
        app:av_layers_count="4"
        app:av_background_color="@color/color_bg"
        />
Java Code
new GLAudioVisualizationView.Builder(getContext())
        .setBubbleSize(R.dimen.bubble_size)
        .setRandomizeBubbleSize(true)
        .setWaveHeight(R.dimen.wave_height)
        .setFooterHeight(R.dimen.footer_height)
        .setWavesCount(7)
        .setLayersCount(4)
        .setBackgroundColorRes(R.color.color_bg)
        .setLayerColors(R.array.colors)
.build();- GLAudioVisualizationView implements AudioVisualization interface. Or you can just cast your view to AudioVisualization interface and use it.
private AudioVisualization audioVisualization;

    ...

@Override
public void onViewCreated(View view, @Nullable Bundle savedInstanceState) {
super.onViewCreated(view, savedInstanceState);
        // you can extract AudioVisualization interface for simplifying things
        audioVisualization = (AudioVisualization) glAudioVisualizationView;
    }

...- You should use linkTo (DbmHandler) method to connect the audio visualization view to the audio output. See DbmHandler.Factoryclass for the list of available handler implementations.
SpeechRecognizerDbmHandler handler = DbmHandler.Factory.newSpeechRecognizerHandler(context);
    handler.innerRecognitionListener(...);
audioVisualization.linkTo(handler);- You must always call onPause method to pause visualization and stop wasting CPU resources for computations in vain. As soon as your view appears in a sight of a user, call onResume.
@Override
    public void onResume() {
        super.onResume();
        audioVisualization.onResume();
    }

    @Override
    public void onPause() {
        audioVisualization.onPause();
        super.onPause();
}- With the use of release () method you free resources when the user stops using the product.
@Override
    public void onDestroyView() {
        audioVisualization.release();
        super.onDestroyView();
}- Also, you can use your own DbmHandler. To do this you should extend your class from DbmHandler class and implement onDataReceivedImpl (T object, int layersCount, float [] outDbmValues, float [] outAmpValues) method where:
object - your custom data type
Then call onDataReceived (T object) method to visualize your data.
Directions CRAudioVisualizationView development project
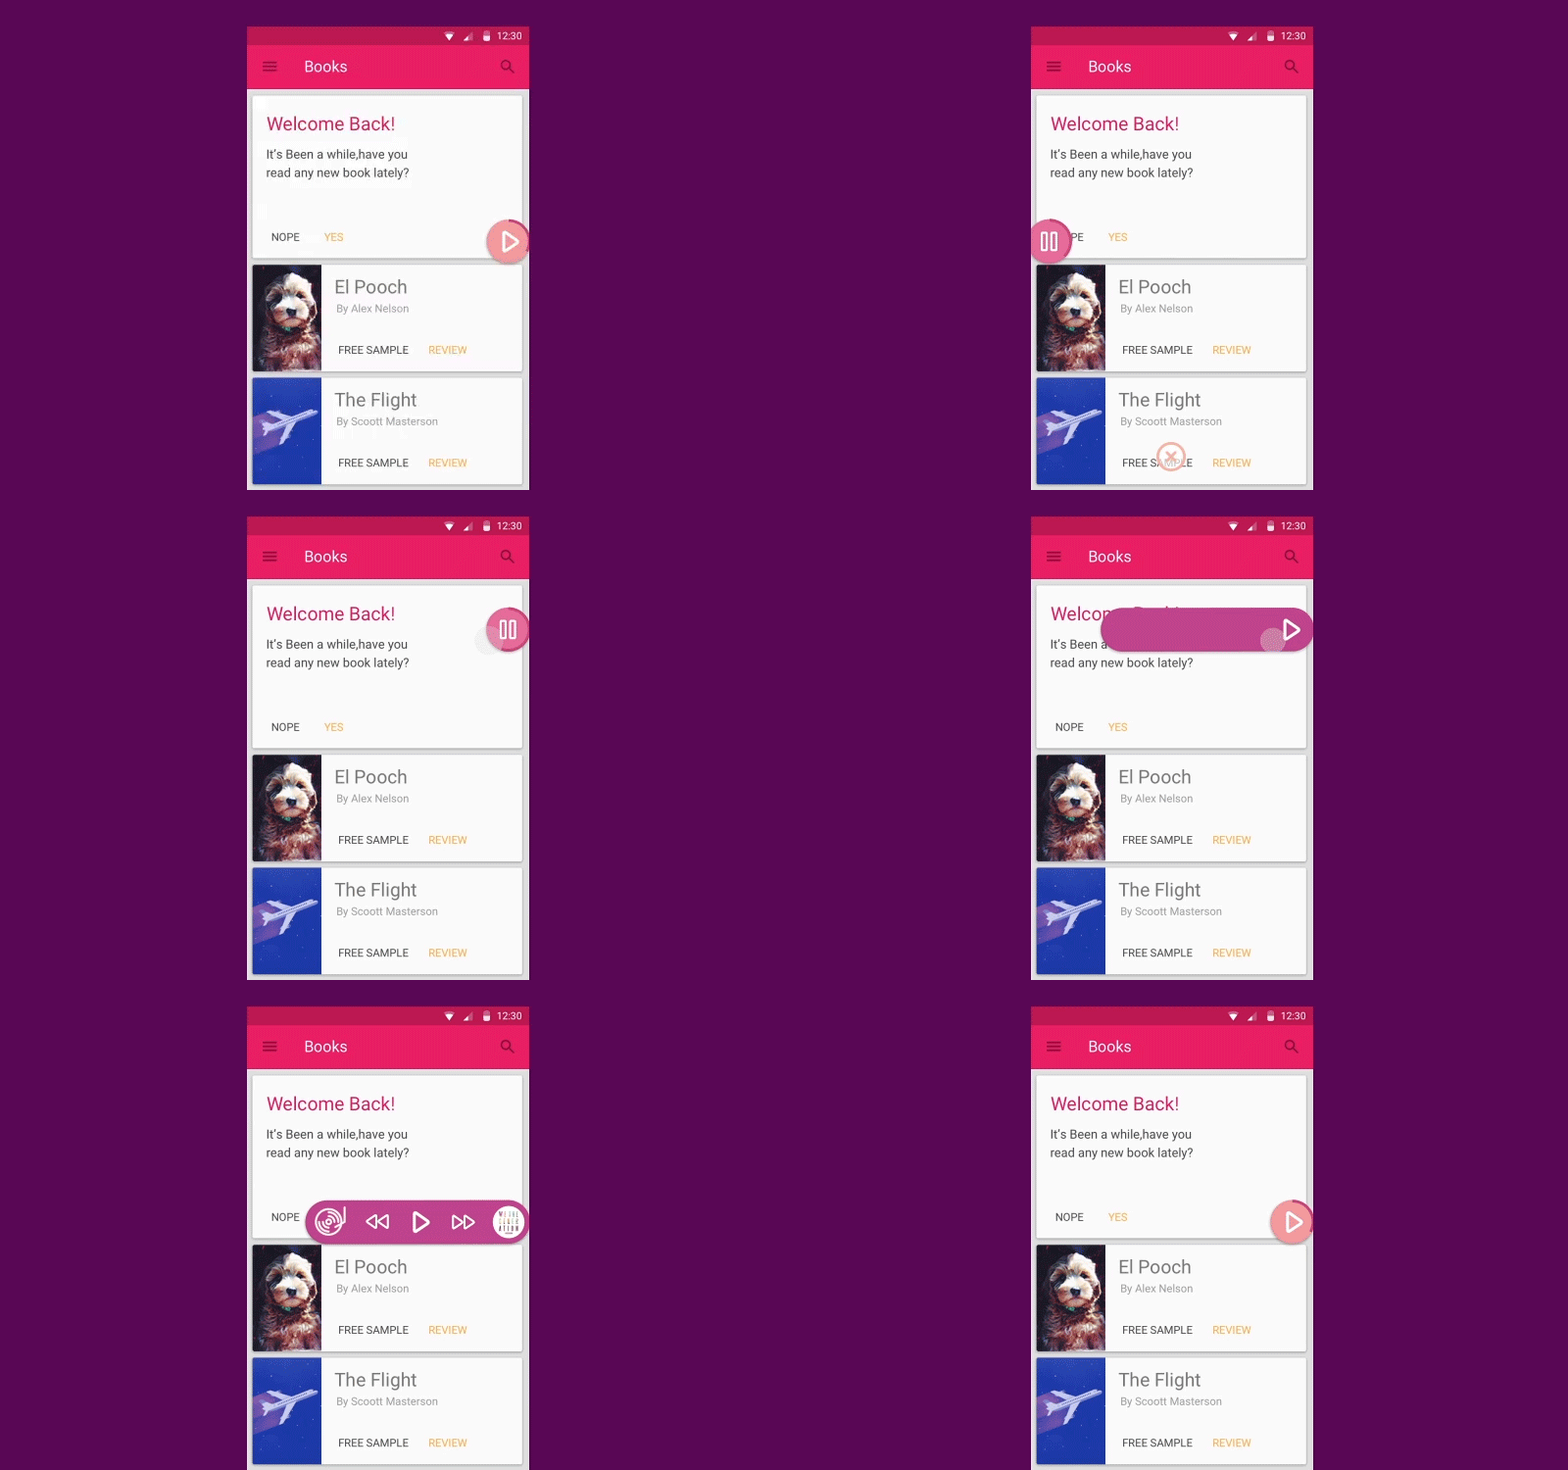
We are not going to stop there and plan to continue developing this project. Continuing working on this concept, we've developed a widget for the music player.

Check out our Dribbble profile for more information.
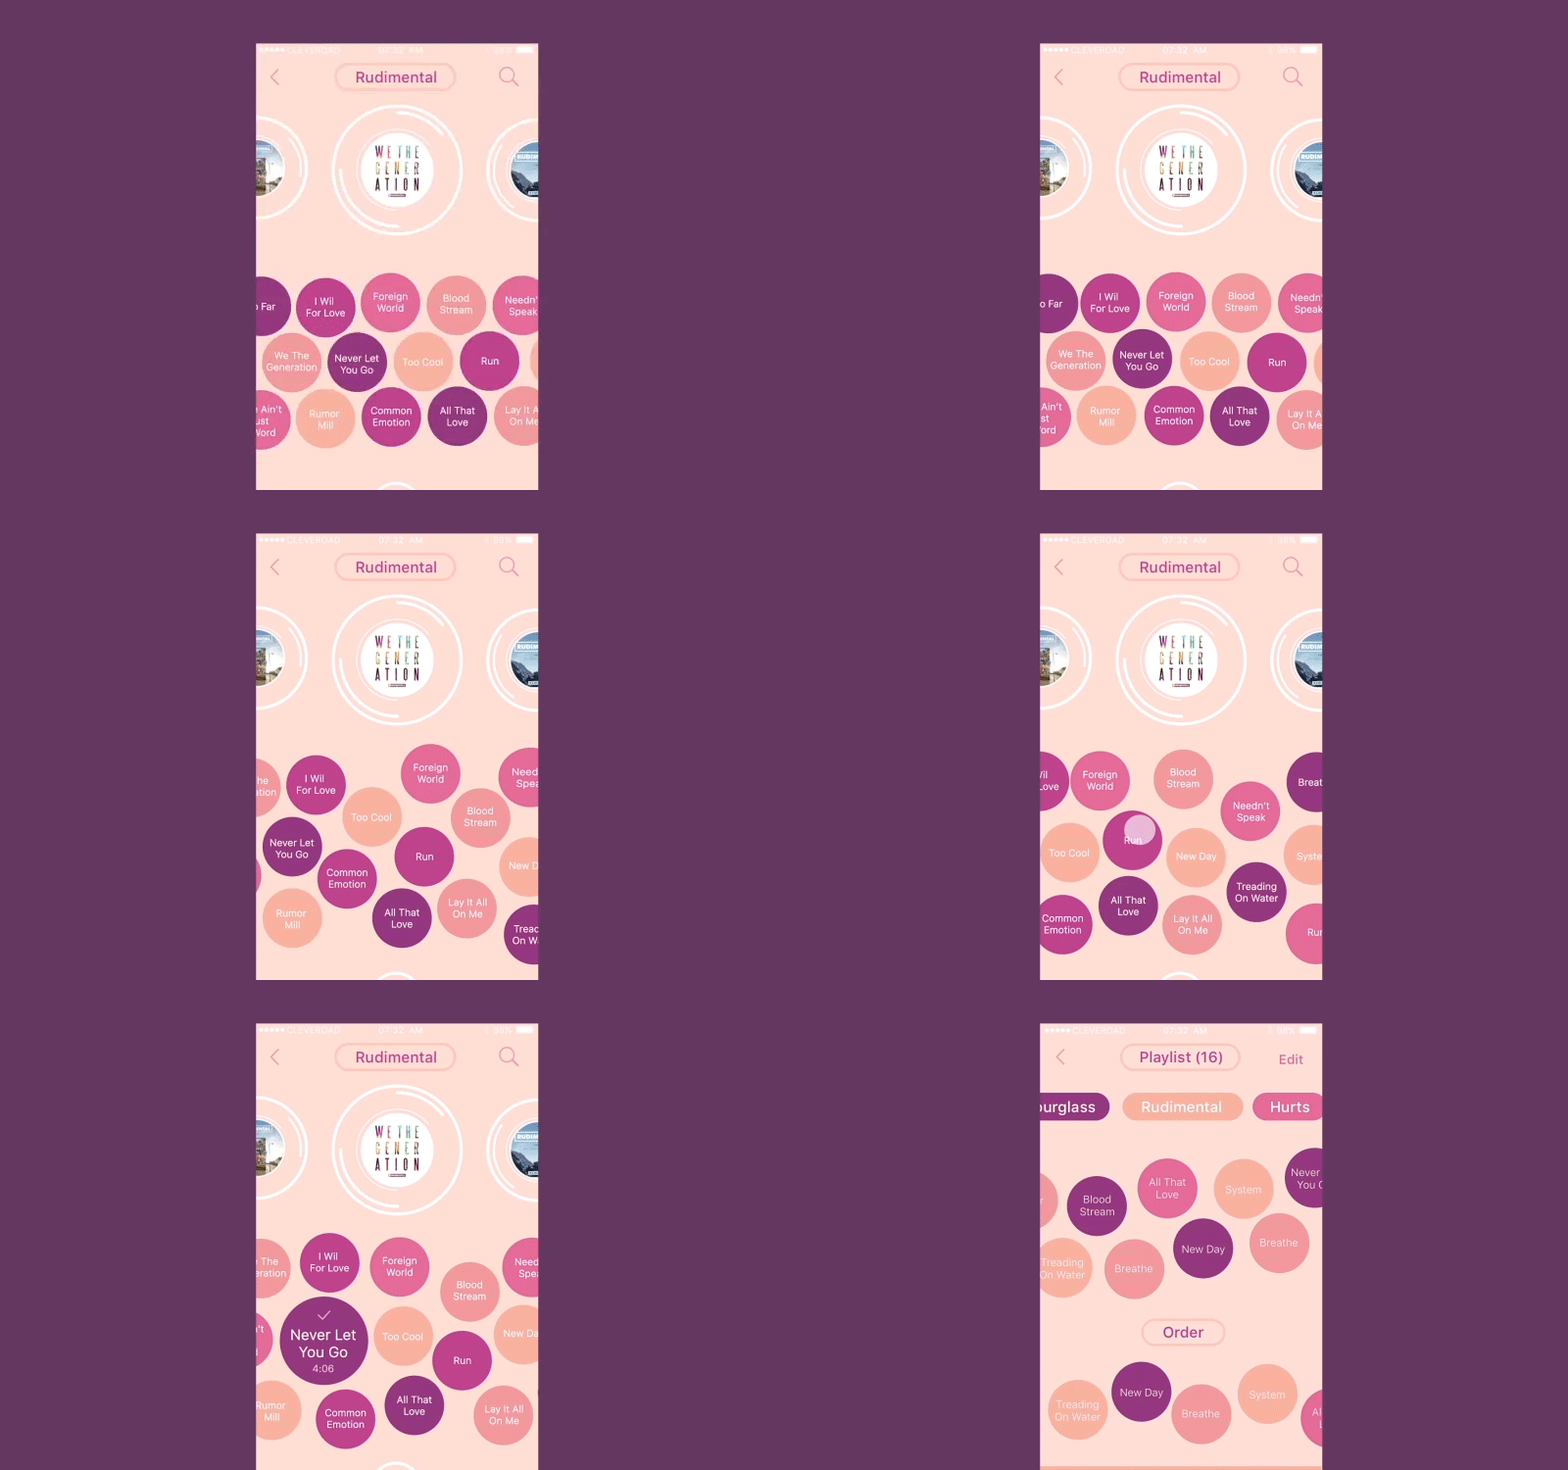
Also, we've designed the concept of the playlist for the music player. It is based on the bubble type also.

Check out our Dribbble profile for more information.
You can find some information about our library on Github. If you still have questions, contact us, and we are always ready to answer any of them. Also, we welcome your feedback and suggestions.

Evgeniy Altynpara is a CTO and member of the Forbes Councils’ community of tech professionals. He is an expert in software development and technological entrepreneurship and has 10+years of experience in digital transformation consulting in Healthcare, FinTech, Supply Chain and Logistics
Give us your impressions about this article
Give us your impressions about this article
Comments
2 commentsI had used this in my app but I am finding it troublesome in changing the waves color and waves background color according to user's choice.
The library is very nice but the layer colors are not gluing up with my theme color. How to change the layer colors?
