Case Study: How to use Charles Web Debugging Proxy
Updated 01 Jun 2023
5 Min
5900 Views
While testing an application on a mobile device, every QA tester has, probably, faced the situation when you tap on a particular item and nothing happens. In other words, it is not always possible to see what was sent or received between your web browser / client and the server. Without this capability, it is very difficult and time-consuming to determine on which side an error has occurred. In such situation to ensure the quality of your app, you need some additional tools.
Find out how Manual and Automation Testing passes and what instruments are used for that in our article!
You can use standard developers' IDE. However, Xcode is not always at hand and Android Studio, in addition to the desired information, gives a lot of unnecessary info. Therefore, the best option for mobile traffic tracking will be the using of a proxy debugger. Personally I have chosen Charles Proxy. In this article, I will discuss how to configure the debugger and install SSL certificates to debug HTTPS connections.
Setup steps for Charles Debugging Proxy
The tool itself can be easily downloaded and installed from the application website. After installing, in the program you need to go to the Proxy > Proxy settings and add the port, in my case I have used port 8888.

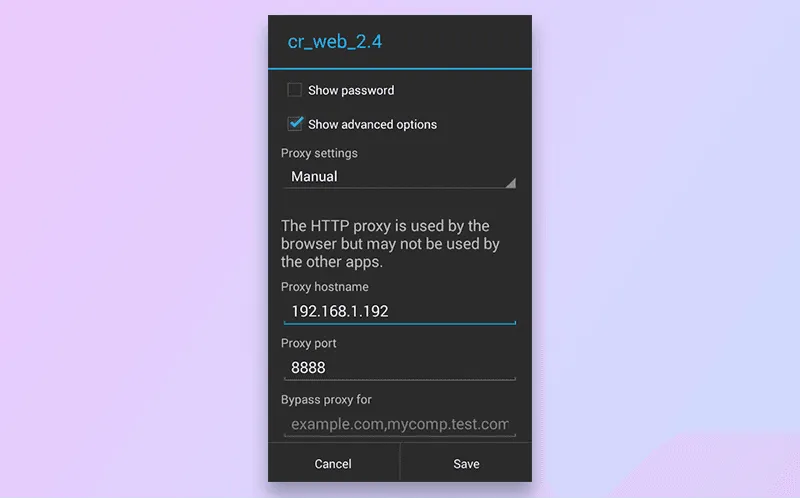
Next, to configure a mobile device you have to make sure that the device and the proxy server are on the same subnet. After that, open the settings of the Wi-Fi connection (long tap on the connection for an Android device), select the "manual" proxy settings, and enter in the "Proxy host name" ( "Server" in the iOS). IP-address of your computer on the network and the installed port in the appropriate field.
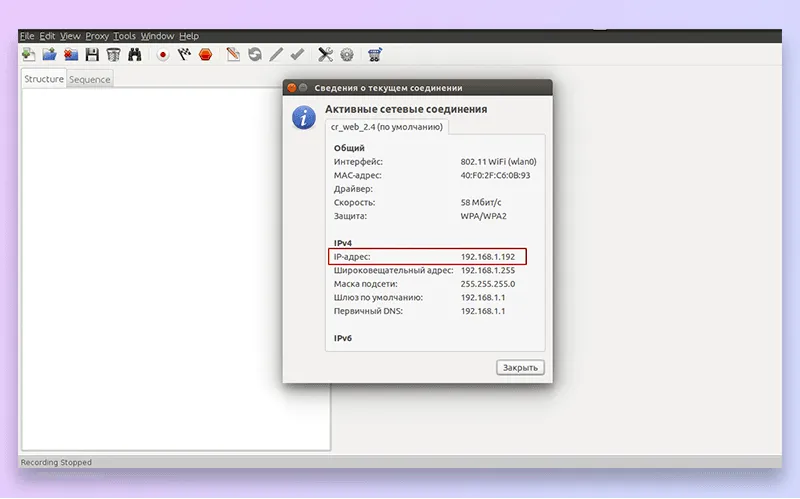
It should look like this.
How to work with Charles Web Debugging Proxy
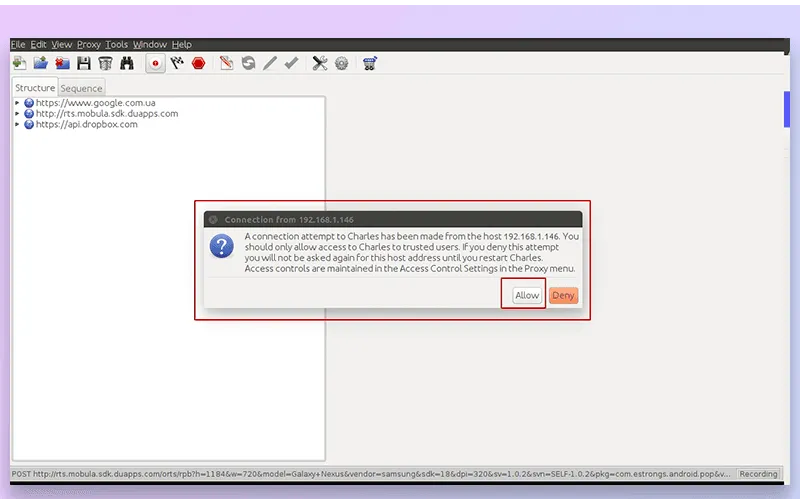
Afterwards, you need to open a browser on a device and go to the site, such as msn.com. The following window will appear in the program. Here you should allow connecting to your mobile device.
Now when "Recording" button is active, Charles will capture all traffic of the device, but information about HTTPS connection is not available. As a rule, the proxy server setting is over here, as most of the tested builds use HTTP. But we'll go ahead and set up Charles Proxy for the device to debug HTTPS connections as well.
For HTTPS monitoring setup, you need to download and install SSL certificates for the tool and device. For the SSL certificates, you need to open the SSL Proxying sub-menu in the Help menu and select "Install Charles Root Certificate". Then in the dialog box, you should add the certificate to your computer.
Your next step is to open your browser on the mobile device and click on the link - charlesproxy.com/getssl. After that, add the name of your certificate and click "OK". The only drawback is that you will have to set a password on your device (if you have an Android one). On the iOS device, you simply install the proposed certificate.
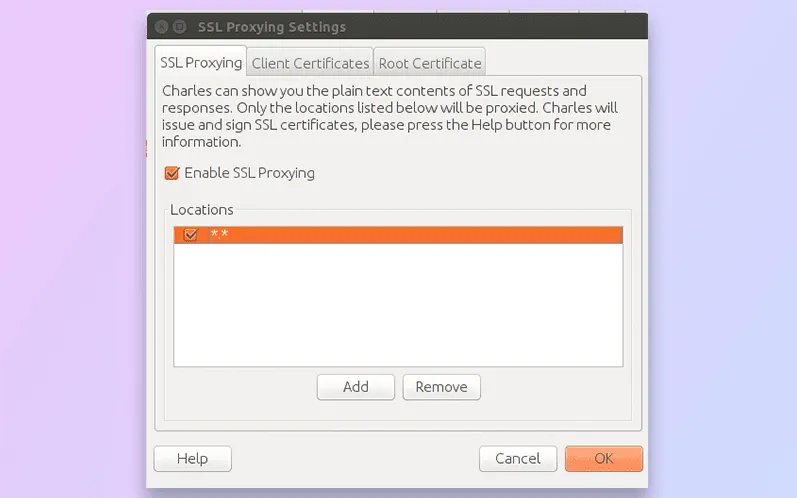
Further, in the desktop application you want to open the menu "Proxy", go to SSL Proxying Settings, and tick "Enable SSL Proxying". The next step is to click "Add" and in the window that opens, write "*" in the Host and Port fields.
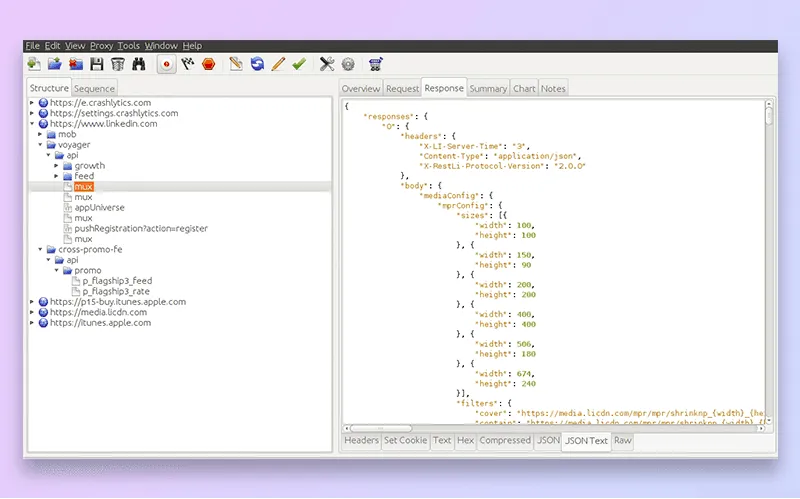
After the certificate is installed and SSL settings are added, you need to open, for example, youtube.com, in the device browser. If everything was done correctly, the Charles will display all the information about your request.
A further possibility of Charles Web Debugging Proxy is to record and display all data received or sent via the browser. To use the tool in the Mozilla Firefox browser, you should install Add-on. Open a browser and write Charlesproxy.com/firefox, then add an addon itself in the browser on the page that opens. Next, open Charles and select the item "Mozilla Firefox Proxy" in the Proxy menu. Now, similar to the client, you can monitor inbound and outbound traffic of the browser.
Thus, Charles Proxy Debugger is a program with a large set of features and intuitive, simple interface, which makes a tester's life much easier, helps to save not only your time, but also the development team's time, and may be used for a variety of platforms and browsers.
If you require any help or have questions, contact our professionals. - we are eager to answer all your tech questions.

Evgeniy Altynpara is a CTO and member of the Forbes Councils’ community of tech professionals. He is an expert in software development and technological entrepreneurship and has 10+years of experience in digital transformation consulting in Healthcare, FinTech, Supply Chain and Logistics
Give us your impressions about this article
Give us your impressions about this article
Comments
2 commentsThanks/1 I was struggeling for 2 days to have set it up because of one setting. Luckely you gave me the information to set the location. Having no location set appears to be the problem as after setting Charles worked fine!
Good Stuff