How We Created ARFaceDetection Library: A Comprehensive Tech Guide
Updated 31 Oct 2022
8 Min
3571 Views
Augmented reality is gaining momentum. And our company couldn’t ignore it as well. That is why our Android developers decided to build an open-source augmented reality library and share it with other developers on GitHub.
ARFaceDetection - the name of AR library for Android OS developed by our programmers. What particularities does it have? ARFaceDetection is capable of detecting images and overlaying various images above the head of the user. The image may move synchronously with head movements, and it looks very unusual.

ARFaceDetection library
If you check this guide, you will be able to build a similar library from scratch using ARCore technology and mobile app development services. Or set it up and use it in your app, if you need one. Ok, let’s go!
Library development stages
We took the following steps to create ARFaceDetection library:
Planning
We have decided to implement the same functionality using two following options:
ARCore technology. This option has some advantages and drawbacks, here they are:
Pros:
- Easier to implement;
- Capable of recognizing images via camera;
- Interaction with a camera is performed out-of-the-box.
Cons:
- Minimum SDK version is 24 (N)
- Minimum OpenGL version is 3.0;
- Not all devices support ARCore functionality (here is the list of devices that support ARCore).
See how our Android developers simplify architecture to build apps faster
ML Kit. There are also its strong and weak sides for your consideration:
Pros:
- Minimum SDK version is 21 (L);
- Supports front-facing and rear-facing cameras.
Cons:
- More complicated to implement;
- It is necessary to create all logic of interaction with a camera by yourself.
Environment setup
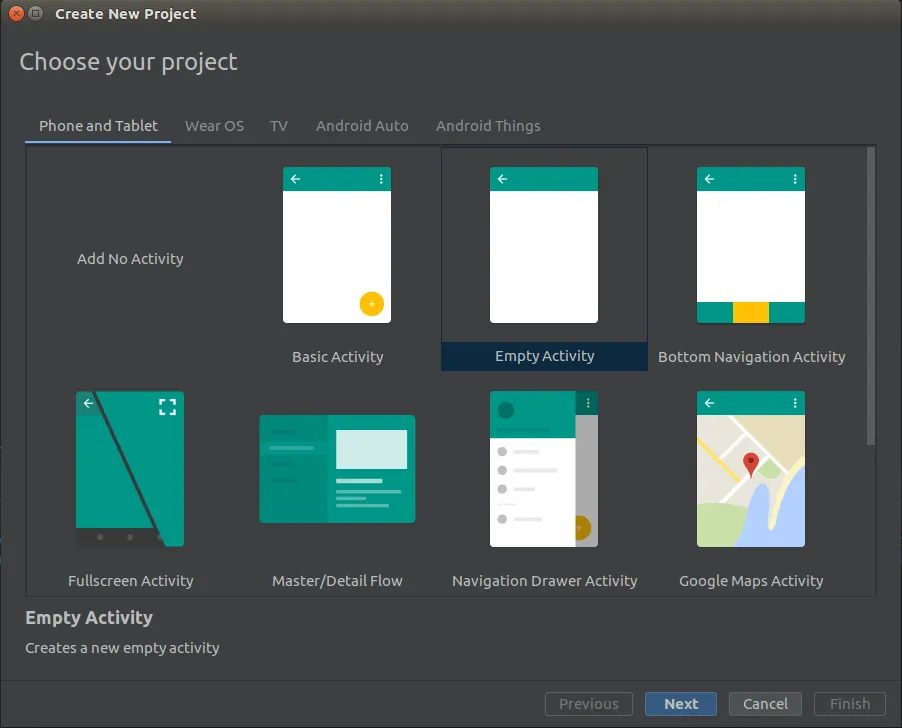
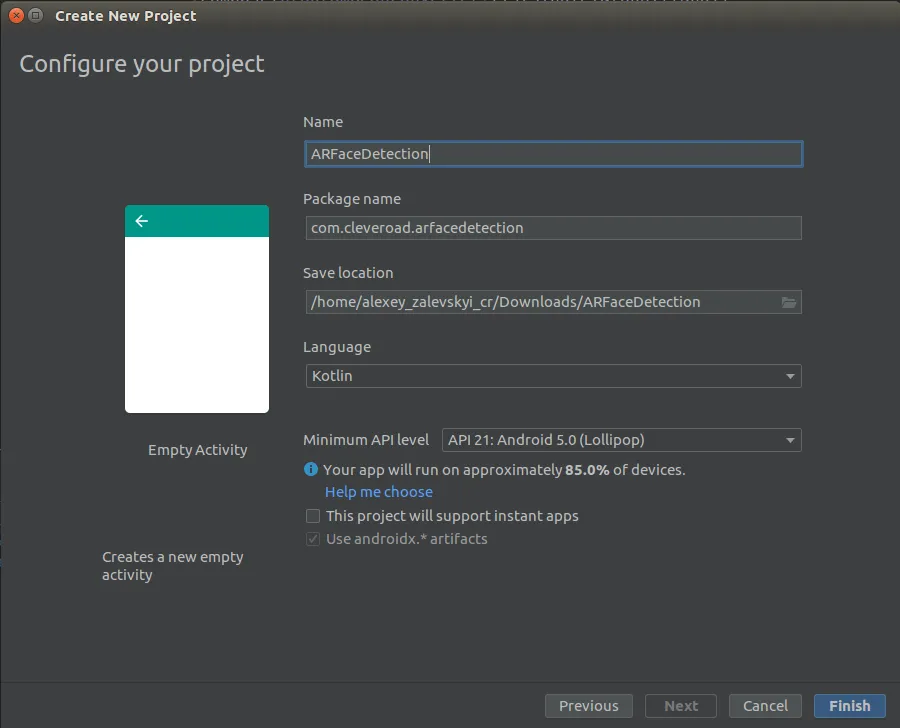
First, it is necessary to create the project in Android Studio as on the pictures below:
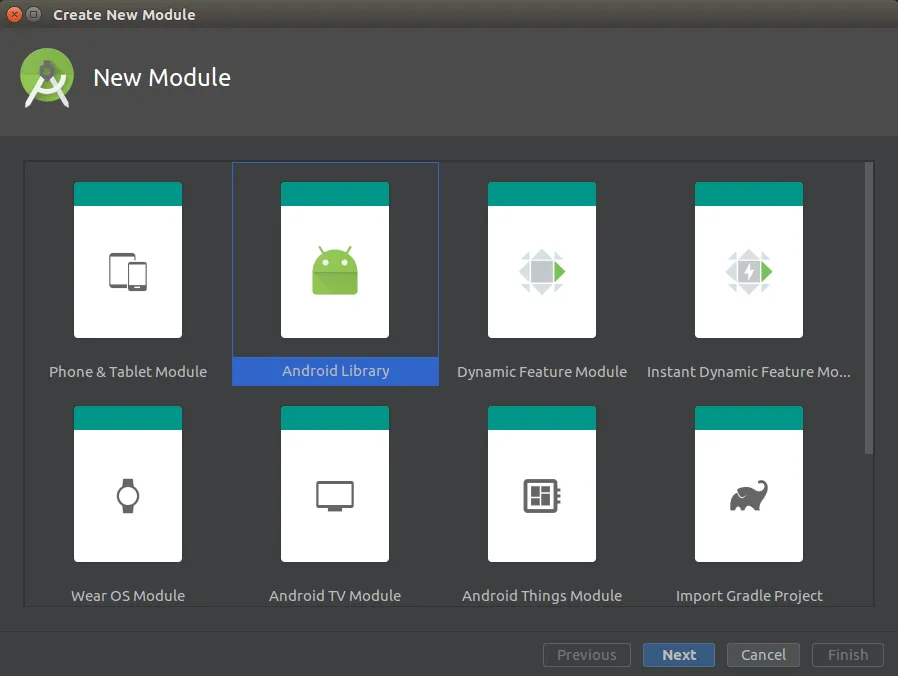
Then, when the project is created, it is required to add a new module (Android Library) to the project:
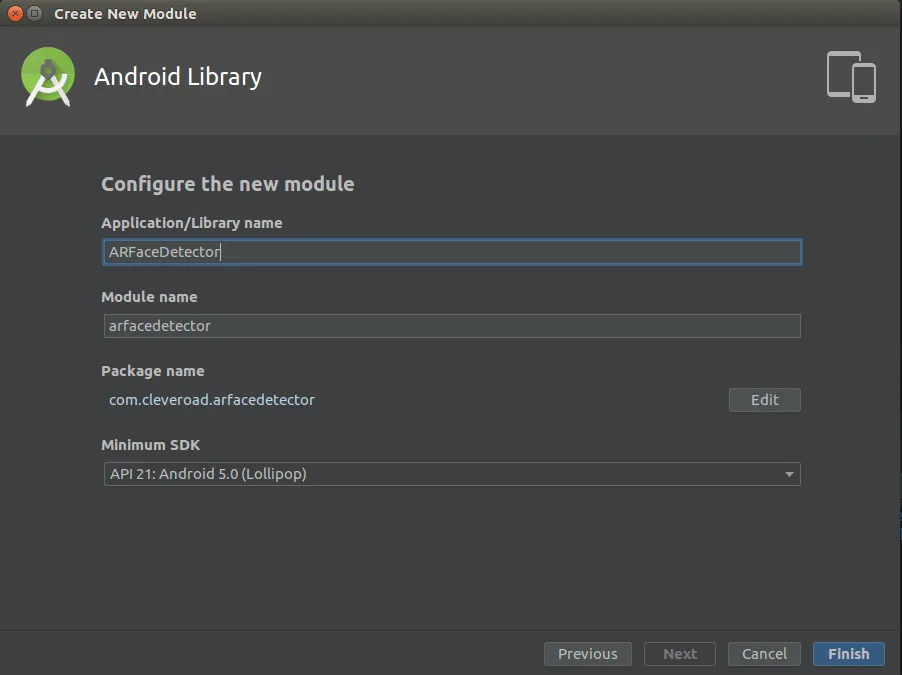
Push the Finish button and wait until Gradle assembles the project.
The development process is initiated
That is where we start the development of Android AR library.
Project configuration
First of all, we need to add the following classes:
- BaseLifecycleFragment - Fragment extension that simplifies its implementation.
- Extensions - these are useful Kotlin functions-extensions that will be used further.
BaseLifecycleFragment.kt:
abstract class BaseLifecycleFragment : Fragment() {

   companion object {
       const val NO_TOOLBAR = -1
       const val NO_TITLE = -1
       const val EMPTY_STRING = ""
   }

   private val textWatchers: Map<EditText?, TextWatcher> = mutableMapOf()

   private var rxPermission: RxPermissions? = null

   protected abstract val layoutId: Int

   protected var toolbar: Toolbar? = null

   private var permissionDisposable: MutableList<Disposable?>? = mutableListOf()

   @CallSuper
   override fun onCreate(savedInstanceState: Bundle?) {
       super.onCreate(savedInstanceState)
       rxPermission = RxPermissions(this)
   }

   override fun onCreateView(inflater: LayoutInflater, container: ViewGroup?, savedInstanceState: Bundle?): View? =
           inflater.inflate(layoutId, container, false)

   override fun onResume() {
       super.onResume()
       initToolbar()
   }

   override fun onDetach() {
       rxPermission = null
       super.onDetach()
   }

   @CallSuper
   override fun onActivityResult(requestCode: Int, resultCode: Int, data: Intent?) {
       super.onActivityResult(requestCode, resultCode, data)
       when (resultCode) {
           Activity.RESULT_OK -> onActivityResultOk(requestCode, data)
           Activity.RESULT_CANCELED -> onActivityResultCanceled(requestCode, data)
       }
   }

   @CallSuper
   protected open fun onActivityResultCanceled(requestCode: Int, data: Intent?) = Unit

   @CallSuper
   protected open fun onActivityResultOk(requestCode: Int, data: Intent?) = Unit

   /**
    * Set if need to show back navigation in toolbar
    *
    * @return True if toolbar has back navigation
    * False if toolbar without back navigation
    */
   open protected fun needToShowBackNav() = true

   protected fun backNavigationIcon(): Int? = R.drawable.ic_arrow_gray_back_24dp

   protected fun setupActionBar(actionBar: ActionBar) = actionBar.run {
       title = getStringScreenTitle()
       setDisplayHomeAsUpEnabled(needToShowBackNav())
   }

   open protected fun setScreenTitle(title: CharSequence?) {
       (activity as? AppCompatActivity)?.supportActionBar?.title = title
   }

   /**
    * Set id of screen title
    *
    * @return Id of screen title
    */
   @StringRes
   protected abstract fun getScreenTitle(): Int

   /**
    * Set if fragment has toolbar
    *
    * @return True if fragment has toolbar
    * False if fragment without toolbar
    */
   protected abstract fun hasToolbar(): Boolean

   /**
    * Set id of toolbar
    *
    * @return Toolbar id
    */
   @IdRes
   protected abstract fun getToolbarId(): Int

   override fun onDestroyView() {
       textWatchers.forEach { (key, value) -> key?.removeTextChangedListener(value) }
       permissionDisposable?.forEach { it?.dispose() }
       super.onDestroyView()
   }

   open protected fun toolbarInitialized() = Unit

   private fun initToolbar() {
       view?.apply {
           if (hasToolbar() && getToolbarId() != NO_TOOLBAR) {
               toolbar = findViewById(getToolbarId())
               initSupportActionBar()
           }
           toolbarInitialized()
       }
   }

   private fun initSupportActionBar() {
       (activity as? AppCompatActivity)?.run {
           setSupportActionBar(toolbar)
           supportActionBar?.let { setupActionBar(it) }
           initBackNavigation()
       }
   }

   private fun initBackNavigation() {
       if (needToShowBackNav()) {
           backNavigationIcon()?.let { toolbar?.setNavigationIcon(it) }
           toolbar?.setNavigationOnClickListener { backPressed() }
       }
   }

   fun backPressed() = activity?.onBackPressed()

   /**
    * Set [String] screen title
    *
    * @return Screen title
    */
   private fun getStringScreenTitle() =
           when (getScreenTitle()) {
               NO_TITLE -> EMPTY_STRING
               else -> getString(getScreenTitle())
           }

   @SuppressWarnings("SpreadOperator")
   protected fun requestPermission(
           vararg permission: String,
           isDeniedCallback: () -> Unit = { },
           isGrantedCallback: () -> Unit
   ) {
       permissionDisposable?.add(rxPermission?.request(*permission)?.subscribe { granted ->
           if (granted) isGrantedCallback() else isDeniedCallback()
       })
   }

   /**
    * @return whether permission is granted
    */
   protected fun checkPermissions(vararg permissions: String): Boolean = permissions.run {
       forEach {
           if (ContextCompat.checkSelfPermission(requireContext(), it) == PackageManager.PERMISSION_DENIED) {
               return false
           }
       }
       return true
   }
}
Extensions.kt source code:
fun <T1 : Any, T2 : Any, R : Any> safeLet(p1: T1?, p2: T2?, block: (T1, T2) -> R?): R? =
       if (p1 == null || p2 == null) null else block(p1, p2)
#1. ARCore option:
Before you start working with ARCore, it is necessary to add the following dependencies to the project:
//sceneform
implementation 'com.google.ar.sceneform.ux:sceneform-ux:1.9.0'
Check out 8 AR SDKs for iOS and Android to enhance your app
The main component of this library part is AugmentedFacesFragment class.
AugmentedFacesFragment.kt source code:
class AugmentedFacesFragment : BaseLifecycleFragment() {

   companion object {
       private const val RES_ID_EXTRA = "res_id"

       fun newInstance(@DrawableRes resId: Int) =
               AugmentedFacesFragment().apply {
                   arguments = Bundle().apply {
                       putInt(RES_ID_EXTRA, resId)
                   }
               }
   }

   override val layoutId = R.layout.fragment_augmented_faces

   private var arFragment: FaceDetectorFragment? = null

   private val faceNodeMap = HashMap<AugmentedFace, CustomAugmentedFaceNode>()

   private var bitmap: Bitmap? = null

   override fun getScreenTitle() = NO_TITLE

   override fun hasToolbar() = false

   override fun getToolbarId() = NO_TOOLBAR

   override fun onViewCreated(view: View, savedInstanceState: Bundle?) {
       if (!ArUtils.checkIsSupportedDevice(requireContext())) return

       bitmap = safeLet(arguments?.getInt(RES_ID_EXTRA), context) { resId, context ->
           BitmapUtils.getBitmapFromVectorDrawable(context, resId)
       }

       arFragment = childFragmentManager.findFragmentById(R.id.face_fragment) as? FaceDetectorFragment

       arFragment?.arSceneView?.apply sceneView@{
           // This is important to make sure that the camera stream renders first so that
           // the face mesh occlusion works correctly.
           cameraStreamRenderPriority = Renderable.RENDER_PRIORITY_FIRST

           scene?.addOnUpdateListener { _ ->
               getFaces(this@sceneView)
               removeFaces()
           }
       }
   }

   /**
    * Make new AugmentedFaceNodes for any new faces.
    */
   private fun getFaces(sceneView: ArSceneView) {
       sceneView.session?.getAllTrackables(AugmentedFace::class.java)?.forEach { face ->
           if (!faceNodeMap.containsKey(face)) {
               safeLet(bitmap, context) { bitmap, context ->
                   faceNodeMap[face] =
                           CustomAugmentedFaceNode(face, context, bitmap)
                                   .apply {
                                       setParent(sceneView.scene)
                                   }
               }
           }
       }
   }

   /**
    * Remove any AugmentedFaceNodes associated with an AugmentedFace that stopped tracking.
    */
   private fun removeFaces() {
       faceNodeMap.entries.iterator().run {
           while (hasNext()) {
               val entry = next()
               if (entry.key.trackingState == TrackingState.STOPPED) {
                   entry.value.setParent(null)
                   remove()
               }
           }
       }
   }
}
The following layout is declared in this fragment:
<FrameLayout xmlns:android="http://schemas.android.com/apk/res/android"
            android:layout_width="match_parent"
            android:layout_height="match_parent">

   <fragment android:name="com.cleveroad.arfacedetector.ui.screens.main.arcore.face_detector.FaceDetectorFragment"
             android:id="@+id/face_fragment"
             android:layout_width="match_parent"
             android:layout_height="match_parent"/>

</FrameLayout>
Where FaceDetectorFragment is our fragment that extends com.google.ar.sceneform.ux.ArFragment. This fragment is designed for working with augmented reality.
In this fragment, we specify a configuration for Session: we turn on Face 3D mesh mode. Thus, ARCore will generate 3D face mesh. Face mesh is a virtual representation of the face, and it consists of vertices, face contours, and head center.
It is necessary to allow ARCore to recognize various face areas.
override fun getSessionConfiguration(session: Session?): Config =
       Config(session).apply {
           augmentedFaceMode = Config.AugmentedFaceMode.MESH3D
       }
Also, we override getSystemFeatures() method: front-facing camera support is necessary.
override fun getSessionFeatures(): MutableSet<Session.Feature> =
       mutableSetOf(Session.Feature.FRONT_CAMERA)
When we create AugmentedFacesFragment, first it is necessary to check the compatibility of the current device with ARCore. For this, we need to make sure that the device has the following OS versions installed >= 24 (N) и OpenGL 3.0.
/**
* Returns false and displays an error message if Sceneform can not run, true if Sceneform can run
* on this device.
*
* Sceneform requires Android N on the device as well as OpenGL 3.0 capabilities.
*
* Finishes the activity if Sceneform can not run
*/
fun checkIsSupportedDevice(context: Context): Boolean {
   if (ArCoreApk.getInstance().checkAvailability(context) == ArCoreApk.Availability.UNSUPPORTED_DEVICE_NOT_CAPABLE) {
       Log.e(LOG_TAG, "Augmented Faces requires ARCore.")
       return false
   }
   val openGlVersionString =
           (context.getSystemService(Context.ACTIVITY_SERVICE) as? ActivityManager)
                   ?.deviceConfigurationInfo
                   ?.glEsVersion
   openGlVersionString?.toDoubleOrNull()?.let {
       if (it < MIN_OPENGL_VERSION) {
           Log.e(LOG_TAG, "Sceneform requires OpenGL ES 3.0 later")
           return false
       }
   }
   return true
}
Then, in onViewCreated() method we extract FaceDetectorFragment. We get its ArSceneView instance. ArSceneView is a SurfaceView that is integrated with ARCore. For ArSceneView instance, we register the camera listener update.
arFragment = childFragmentManager.findFragmentById(R.id.face_fragment) as? FaceDetectorFragment

arFragment?.arSceneView?.apply sceneView@{
   // This is important to make sure that the camera stream renders first so that
   // the face mesh occlusion works correctly.
   cameraStreamRenderPriority = Renderable.RENDER_PRIORITY_FIRST

   scene?.addOnUpdateListener { _ ->
       getFaces(this@sceneView)
       removeFaces()
   }
}
During each camera update, we are requesting to know whether there are new faces. If there are, we create a new object CustomAugmentedFaceNode that is added to our SceneView.
/**
* Make new AugmentedFaceNodes for any new faces.
*/
private fun getFaces(sceneView: ArSceneView) {
   sceneView.session?.getAllTrackables(AugmentedFace::class.java)?.forEach { face ->
       if (!faceNodeMap.containsKey(face)) {
           safeLet(bitmap, context) { bitmap, context ->
               faceNodeMap[face] =
                       CustomAugmentedFaceNode(face, context, bitmap)
                               .apply {
                                   setParent(sceneView.scene)
                               }
           }
       }
   }
}
Also, during each camera update, you need to remove all faces that become invisible. You can find out it using AugmentedFace.getTrackingState() method.
/**
* Remove any AugmentedFaceNodes associated with an AugmentedFace that stopped tracking.
*/
private fun removeFaces() {
   faceNodeMap.entries.iterator().run {
       while (hasNext()) {
           val entry = next()
           if (entry.key.trackingState == TrackingState.STOPPED) {
               entry.value.setParent(null)
               remove()
           }
       }
   }
}
CustomAugmentedFaceNode is our custom class that extends om.google.ar.sceneform.ux.AugmentedFaceNode. In fact, the main library logic is implemented.
In this class we need to override 2 methods:
- onActivate() - it starts when a current node becomes active.
- onUpdate() - it starts when a current node is updated.
In onActivate() method we create node for our image, create ImageView object. Then set bitmap in ImageView that should be displayed. And in node, we set the created ImageView.
@RequiresApi(Build.VERSION_CODES.N)
override fun onActivate() {
   super.onActivate()
   imageNode = Node().apply {
       setParent(this@CustomAugmentedFaceNode)
       isEnabled = isTracking()
   }

   val imageView = LayoutInflater.from(context).inflate(R.layout.image_node_view, null) as ImageView
   imageView.setImageBitmap(bitmap)

   ViewRenderable.builder()
           .setView(context, imageView)
           .build()
           .thenAccept { renderable ->
               imageNode?.renderable = renderable
           }
           .exceptionally { throwable ->
               Log.e(LOG_TAG, "Could not load plane card view.", throwable)
               throw AssertionError("Could not load plane card view.", throwable)
           }
}
In onUpdate() method, we fill in an image to the scene. First, we identify whether this face is visible:
private fun isTracking() =
       augmentedFace != null && augmentedFace?.trackingState == TrackingState.TRACKING
Then we identify the coordinates for an image to locate it above the face:
- For node image, we specify rotation angle identical to face rotation angle (our CustomAugmentedFaceNode).
imageNode?.worldRotation = worldRotation
- Calculate the left and right forehead position.
val rightHeard = getRegionPose(AugmentedFace.RegionType.FOREHEAD_RIGHT)
val leftHeard = getRegionPose(AugmentedFace.RegionType.FOREHEAD_LEFT)
- Calculate the Z-coordinate of our image as follows:
- We calculate the Z-coordinate of the forehead center.
(leftHeard.tz() + rightHeard.tz()) / HALF_DIVIDER
- Then calculate Z-axis distance from nose tip to head center.
(getRegionPose(AugmentedFace.RegionType.NOSE_TIP).tz()
       - centerPose.tz()) * -1
- Add the distance to vertex center to Z-coordinate of forehead center.
 val zCoordinate =
       (leftHeard.tz() + rightHeard.tz()) / HALF_DIVIDER
+ (getRegionPose(AugmentedFace.RegionType.NOSE_TIP).tz()
       - centerPose.tz()) * -1
- Then we specify the position for an image on the basis of coordinates that we got previously
imageNode?.worldPosition =
       Vector3((leftHeard.tx() + rightHeard.tx()) / HALF_DIVIDER,
               (leftHeard.ty() + rightHeard.ty()) / HALF_DIVIDER,
               zCoordinate)
Thus, the image is hanging above the head center.
override fun onUpdate(frameTime: FrameTime?) {
   super.onUpdate(frameTime)

   imageNode?.isEnabled = isTracking().apply {
       augmentedFace?.takeIf { this }?.run {
           imageNode?.worldRotation = worldRotation
           val rightHeard = getRegionPose(AugmentedFace.RegionType.FOREHEAD_RIGHT)
           val leftHeard = getRegionPose(AugmentedFace.RegionType.FOREHEAD_LEFT)

           val zCoordinate =
                   (leftHeard.tz() + rightHeard.tz()) / HALF_DIVIDER
           + (getRegionPose(AugmentedFace.RegionType.NOSE_TIP).tz()
                   - centerPose.tz()) * -1
           imageNode?.worldPosition =
                   Vector3((leftHeard.tx() + rightHeard.tx()) / HALF_DIVIDER,
                           (leftHeard.ty() + rightHeard.ty()) / HALF_DIVIDER,
                           zCoordinate)
       }
   }
}
CustomAugmentedFaceNode source code:
class CustomAugmentedFaceNode(augmentedFace: AugmentedFace?, private val context: Context, private val bitmap: Bitmap) :
       AugmentedFaceNode(augmentedFace) {

   companion object {
       private const val HALF_DIVIDER = 2
       private val LOG_TAG = this::class.java.simpleName
   }

   private var imageNode: Node? = null

   @RequiresApi(Build.VERSION_CODES.N)
   override fun onActivate() {
       super.onActivate()
       imageNode = Node().apply {
           setParent(this@CustomAugmentedFaceNode)
           isEnabled = isTracking()
       }

       val imageView = LayoutInflater.from(context).inflate(R.layout.image_node_view, null) as ImageView
       imageView.setImageBitmap(bitmap)

       ViewRenderable.builder()
               .setView(context, imageView)
               .build()
               .thenAccept { renderable ->
                   imageNode?.renderable = renderable
               }
               .exceptionally { throwable ->
                   Log.e(LOG_TAG, "Could not load plane card view.", throwable)
                   throw AssertionError("Could not load plane card view.", throwable)
               }
   }

   override fun onUpdate(frameTime: FrameTime?) {
       super.onUpdate(frameTime)

       imageNode?.isEnabled = isTracking().apply {
           augmentedFace?.takeIf { this }?.run {
               imageNode?.worldRotation = worldRotation
               val rightHeard = getRegionPose(AugmentedFace.RegionType.FOREHEAD_RIGHT)
               val leftHeard = getRegionPose(AugmentedFace.RegionType.FOREHEAD_LEFT)

               val zCoordinate =
                       (leftHeard.tz() + rightHeard.tz()) / HALF_DIVIDER + (getRegionPose(AugmentedFace.RegionType.NOSE_TIP).tz() - centerPose.tz()) * -1
               imageNode?.worldPosition =
                       Vector3((leftHeard.tx() + rightHeard.tx()) / HALF_DIVIDER,
                               (leftHeard.ty() + rightHeard.ty()) / HALF_DIVIDER,
                               zCoordinate)
           }
       }
   }

   private fun isTracking() =
           augmentedFace != null && augmentedFace?.trackingState == TrackingState.TRACKING
}
#2. ML Kit option:
Before you start working with this section, you need to connect the following dependencies:
// ml kit
implementation 'com.google.firebase:firebase-core:16.0.9'
implementation 'com.google.firebase:firebase-ml-vision:20.0.0'
implementation 'com.google.firebase:firebase-ml-vision-face-model:17.0.2'
Also, for quick implementation of this library part, we used the following classes from official Google instance:
- BitmapUtils. Functions and utilities for bitmaps transformation.
- VisionImageProcessor. An interface for processing of images using various ML Kit detectors.
- BaseVisionProcessor. A basic implementation of VisionImageProcessor.
- CameraSource. It provides a simple interface for working with a camera. It controls the camera and updates the user interface. It receives frames from the camera at a specified rate.
- CameraSourcePreview. A custom ViewGroup is a shell for SurfaceView, and it is in charge of a picture displaying from the camera.
- FrameMetadata. It describes the information about the frame captured by the camera.
- GraphicOverlay. A custom View that displays the series of custom graphic objects that will be overlaid over images from the camera.
FaceDetectorFragment.kt source code:
class FaceDetectorFragment : BaseLifecycleFragment(), CompoundButton.OnCheckedChangeListener {

   companion object {
       private val LOG_TAG = this::class.java.simpleName
       private const val RES_ID_EXTRA = "res_id"

       fun newInstance(@DrawableRes resId: Int) =
               FaceDetectorFragment().apply {
                   arguments = Bundle().apply {
                       putInt(RES_ID_EXTRA, resId)
                   }
               }
   }

   override val layoutId = R.layout.ml_kit_face_detector_fragment

   private var cameraSource: CameraSource? = null

   override fun getScreenTitle() = NO_TITLE

   override fun hasToolbar() = false

   override fun getToolbarId() = NO_TOOLBAR

   override fun onViewCreated(view: View, savedInstanceState: Bundle?) {
       super.onViewCreated(view, savedInstanceState)

       tbFacingSwitch.run {
           setOnCheckedChangeListener(this@FaceDetectorFragment)
           // Hide the toggle button if there is only 1 camera
           if (Camera.getNumberOfCameras() == 1) visibility = GONE
       }
       requestPermission(CAMERA) {
           createCameraSource()
           startCameraSource()
       }
   }

   override fun onCheckedChanged(buttonView: CompoundButton, isChecked: Boolean) {
       cameraSource?.setFacing(if (isChecked) CAMERA_FACING_FRONT else CAMERA_FACING_BACK)
       cameraSourcePreview?.stop()
       startCameraSource()
   }

   override fun onResume() {
       super.onResume()
       startCameraSource()
   }

   /** Stops the camera.  */
   override fun onPause() {
       cameraSourcePreview?.stop()
       super.onPause()
   }

   override fun onDestroy() {
       cameraSource?.release()
       super.onDestroy()
   }

   /**
    * Starts or restarts the camera source, if it exists. If the camera source doesn't exist yet
    * (e.g., because onResume was called before the camera source was created), this will be called
    * again when the camera source is created.
    */
   private fun startCameraSource() {
       cameraSource?.let {
           try {
               cameraSourcePreview ?: Log.d(LOG_TAG, "resume: Preview is null")
               faceOverlay ?: Log.d(LOG_TAG, "resume: graphOverlay is null")
               safeLet(cameraSourcePreview, faceOverlay) { firePreview, fireFaceOverlay ->
                   firePreview.start(cameraSource, fireFaceOverlay)
               }
           } catch (e: IOException) {
               Log.e(LOG_TAG, "Unable to start camera source.", e)
               cameraSource?.release()
               cameraSource = null
           }
       }
   }

   private fun createCameraSource() {
       // If there's no existing cameraSource, create one.
       if (cameraSource == null) {
           cameraSource = CameraSource(activity, faceOverlay)
       }
       safeLet(context, arguments?.getInt(RES_ID_EXTRA)) { context, resId ->
           BitmapUtils.getBitmapFromVectorDrawable(context, resId)?.let {
               try {
                   cameraSource?.setMachineLearningFrameProcessor(FaceDetectionProcessor(it))
               } catch (e: FirebaseMLException) {
                   Log.e(LOG_TAG, "can not create camera source: face contour", e)
               }
           }
       }
   }
}
It contains the following layout:
<?xml version="1.0" encoding="utf-8"?>
<RelativeLayout
       xmlns:android="http://schemas.android.com/apk/res/android"
       android:id="@+id/topLayout"
       android:orientation="vertical"
       android:layout_width="match_parent"
       android:layout_height="match_parent"
       android:background="@android:color/black"
       android:keepScreenOn="true">

   <com.cleveroad.arfacedetector.ui.screens.main.mlkit.common.CameraSourcePreview
           android:id="@+id/cameraSourcePreview"
           android:layout_width="match_parent"
           android:layout_height="wrap_content"
           android:layout_alignParentStart="true"
           android:layout_alignParentTop="true">

       <com.cleveroad.arfacedetector.ui.screens.main.mlkit.common.GraphicOverlay
               android:id="@+id/faceOverlay"
               android:layout_width="match_parent"
               android:layout_height="match_parent"
               android:layout_alignParentStart="true"
               android:layout_alignParentTop="true"
               android:layout_alignParentBottom="true"/>

   </com.cleveroad.arfacedetector.ui.screens.main.mlkit.common.CameraSourcePreview>

   <ToggleButton
           android:id="@+id/tbFacingSwitch"
           android:layout_width="wrap_content"
           android:layout_height="wrap_content"
           android:layout_alignParentBottom="true"
           android:textOff="@string/front"
           android:textOn="@string/main"
           android:checked="false"/>

</RelativeLayout>
ToggleButton is used for camera modes switching (front-facing/rear-facing).
When creating FaceDetectorFragment, we register the listener for ToggleButton. Also, we check how many cameras are available. If only one is available, we hide ToggleButton. Besides, we request camera permission.
override fun onViewCreated(view: View, savedInstanceState: Bundle?) {
   super.onViewCreated(view, savedInstanceState)

   tbFacingSwitch.run {
       setOnCheckedChangeListener(this@FaceDetectorFragment)
       // Hide the toggle button if there is only 1 camera
       if (Camera.getNumberOfCameras() == 1) visibility = GONE
   }
   requestPermission(CAMERA) {
       createCameraSource()
       startCameraSource()
   }
}
If the user has granted all related permissions, we start the image from the camera.
Then we initialize CameraSource instance.
When creating CameraSource instance, we indicate that on an image captured by the camera we want to detect faces: we do it using CameraSource.setMachineLearningFrameProcessor(),where we transfer FaceDetectionProcessor instance.
private fun createCameraSource() {
   // If there's no existing cameraSource, create one.
   if (cameraSource == null) {
       cameraSource = CameraSource(activity, faceOverlay)
   }
   safeLet(context, arguments?.getInt(RES_ID_EXTRA)) { context, resId ->
       BitmapUtils.getBitmapFromVectorDrawable(context, resId)?.let {
           try {
             cameraSource?.setMachineLearningFrameProcessor(FaceDetectionProcessor(it))
           } catch (e: FirebaseMLException) {
               Log.e(LOG_TAG, "can not create camera source: face contour", e)
           }
       }
   }
}
And we don’t forget to release resources when a user leaves a screen:
override fun onResume() {
   super.onResume()
   startCameraSource()
}

/** Stops the camera.  */
override fun onPause() {
   cameraSourcePreview?.stop()
   super.onPause()
}
FaceDetectionProcessor is an implementation of VisionImageProcessor - an interface of images processing using various ML Kit detectors. As for FaceDetectionProcessor, its function is to detect faces.
In case of successful image detection, callback onSuccess() is called from FaceDetectionProcessor.
override fun onSuccess(originalCameraImage: Bitmap,
                      results: List<FirebaseVisionFace>,
                      frameMetadata: FrameMetadata,
                      graphicOverlay: GraphicOverlay) {
   graphicOverlay.clear()
   graphicOverlay.add(CameraImageGraphic(graphicOverlay, originalCameraImage))
   for (i in results.indices) {
       val face = results[i]
       val faceGraphic = FaceGraphic(graphicOverlay, face, overlayBitmap, frameMetadata.cameraFacing)
       graphicOverlay.add(faceGraphic)
   }
   graphicOverlay.postInvalidate()
}
Inside this method, we create FaceGraphic instance that we add over a picture from camera.FaceGraphic is a custom view where calculations of face position are performed, and an image is added.
/**
* Graphic instance for rendering face position, orientation, and landmarks within an associated
* graphic overlay view.
*/
class FaceGraphic(overlay: GraphicOverlay,
                 private val firebaseVisionFace: FirebaseVisionFace,
                 private val overlayBitmap: Bitmap?,
                 private val cameraFacing: Int) : GraphicOverlay.Graphic(overlay) {

   override fun draw(canvas: Canvas) {
       val leftEye = firebaseVisionFace.getLandmark(LEFT_EYE)?.position ?: return
       val rightEye = firebaseVisionFace.getLandmark(RIGHT_EYE)?.position ?: return
       val mouthBottom = firebaseVisionFace.getLandmark(MOUTH_BOTTOM)?.position ?: return

       val faceHeight = firebaseVisionFace.boundingBox.height() * 1.3F

       val direction =
               Vector3((rightEye.x + leftEye.x) / 2 - mouthBottom.x,
                       (rightEye.y + leftEye.y) / 2 - mouthBottom.y,
                       0F
               ).normalized()
       direction.x *= faceHeight
       direction.y *= faceHeight

       val x = translateX(mouthBottom.x + direction.x)
       val y = translateY(mouthBottom.y + direction.y)

       overlayBitmap?.let {
           rotateBitmap(it, cameraFacing, firebaseVisionFace.headEulerAngleY, firebaseVisionFace.headEulerAngleZ)
       }?.let {
           val imageEdgeSizeBasedOnFaceSizeX = it.width
           val imageEdgeSizeBasedOnFaceSizeY = it.height

           val left = (x - imageEdgeSizeBasedOnFaceSizeX).toInt()
           val top = (y - imageEdgeSizeBasedOnFaceSizeY).toInt()
           val right = (x + imageEdgeSizeBasedOnFaceSizeX).toInt()
           val bottom = (y + imageEdgeSizeBasedOnFaceSizeY).toInt()

           canvas.drawBitmap(it, null, Rect(left, top, right, bottom), null)

       }
   }
}
To create an effect of the image that is hanging over the head, you need to undertake the following steps:
- The calculation of coordinates point of left and right eye, chin, calculation of face height;
- The calculation of head tilts vector based on these coordinates;
- The calculation of coordinates for an image (vector point + face height are taken);
- Image rotation based on the head rotation angle;
- Image rendering with calculated coordinates.
You can find all source code of the library in our GitHub profile.
Library integration process
If you don’t want to create a similar library from scratch, you can integrate our ARFaceDetection library into your Android app using the manual below.
First, you need to add dependencies to the project:
dependencies {
    implementation 'com.google.firebase:firebase-core:16.0.9'
    implementation 'com.cleveroad.ARFaceDetection:ar-face-detection:1.0.2'
}
Second, you need to add to Android.manifest:
<manifest ...>
    ...
    <uses-permission android:name="android.permission.CAMERA"/>
    <uses-feature android:name="android.hardware.camera.ar" android:required="true"/>
    <uses-feature android:name="android.hardware.camera"/>
    <uses-feature android:name="android.hardware.camera.autofocus"/>
    <application ...>
    ....
        <meta-data
            android:name="com.google.ar.core"
            android:value="required"/>
        <meta-data
            android:name="com.google.firebase.ml.vision.DEPENDENCIES"
            android:value="face"/>
    ...
   </application>
</manifest>
Also, you need to register your project on Firebase.
Then generate google-services.json file and migrate it to App Directory.
Add to MyApp.kt:
class MyApp : Application() {
    ...
    override fun onCreate() {
        super.onCreate()
        ...
        FirebaseApp.initializeApp(this)
        ...
   }
}
To use ARCore library functionality, it is necessary to call the following:
val fragment = AugmentedFacesFragment.newInstance(R.drawable.icon)
supportFragmentManager.beginTransaction().apply {
   replace(R.id.container, fragment, fragment.javaClass.simpleName)
}.commit()
To use ML Kit library functionality, it is required to call the following:
val fragment = FaceDetectorFragment.newInstance(R.drawable.icon)
supportFragmentManager.beginTransaction().apply {
    replace(R.id.container, fragment, fragment.javaClass.simpleName)
}.commit()
Where R.drawable.icon is the identificator of drawable resource that should be displayed over the head.
I hope this guide was useful and cognitive for you. You can build your face detection library considering your modifications, or use our ARFaceDetection library to integrate into your app. Everything depends on your requirements. Feel free to contact us as well!

Evgeniy Altynpara is a CTO and member of the Forbes Councils’ community of tech professionals. He is an expert in software development and technological entrepreneurship and has 10+years of experience in digital transformation consulting in Healthcare, FinTech, Supply Chain and Logistics
Give us your impressions about this article
Give us your impressions about this article