Case Study: Loop Bar for Android
Updated 06 Jun 2023
5 Min
6360 Views
Entering Google Play, you can be drowned in a variety of applications. However, if you open a few of them, you will realize that creative approach is not always in charge of implementation, especially, when it comes to details. Having come up against this situation at Cleveroad, we decided that just won't do and made a decision to dilute the usual kind of Android apps. This is when the idea of Loop Bar came to our mind.
We will not hide the fact that it was to some extent borrowed from iOS. Nevertheless, we took care of it's natural look on Android platform and a freshness which it brings there. The main purpose is to give your users a new experience and show that navigation panel is not the only option which can be used for swapping between categories.
Customers comfort is our priority that is why we provided the ability to place the bar either horizontally or vertically. Thus, it is possible to not only customize the application look but also choose the most efficient user experience. In order to be substantive, let's dive into details and see how the Cleveroad Loop Bar library actually works and which way it can be integrated into your app.
See also: Case Study: Crumbling Tutorial For Android
Setting up
At the initial stage, you have to set the library up. You have two options to do it:
Option 1. Specify the library in the gradle build script. Afterwards, it can be used in the application (it will be pulled by the gradle from the maven repository).
Here is how you are going to do it:
- Set the dependency 'compile "com.cleveroad:loopbar:1.0.0' in the build.gradle file
- Get the library downloaded from the maven repository
- Add 'LoopBarView' widget into your XML file
by gradle: dependencies { compile "com.cleveroad:loopbar:1.0.0" }
Option 2. Simply, download zip file and import "LoopBar-widget" module. Afterwards, you will be able to modify the sources according to your needs.
Features available
There two parts which build library view:
If all the groups do not fit on the screen, you can scroll through them. The list is loopable. So, in case you have, for example, five groups in total (Auto, Balance, Brush, Moon, Palette) and one of them (Palette) does not fit on the screen, you can scroll through and see the missing group (Palette) along with the previous ones (Balance, Brush, Moon) except for the very first group (Auto) which would not fit the screen now.
You can select either horizontal or vertical position of the Loop Bar. You can also attach it to any other element in your layout. Thus, it's position is totally flexible.
In addition, you are free to determine the location of the icon which shows which group is now selected. The icon is updated with the animation when being taped. You can change it the way you like by applying a standard animation or setting up the customized one.
The background color is yellow by default. However, you can change it if needed.
You are allowed to use any RecyclerView adapter you want. Concrete infinite scroll logic is fully encapsulated.
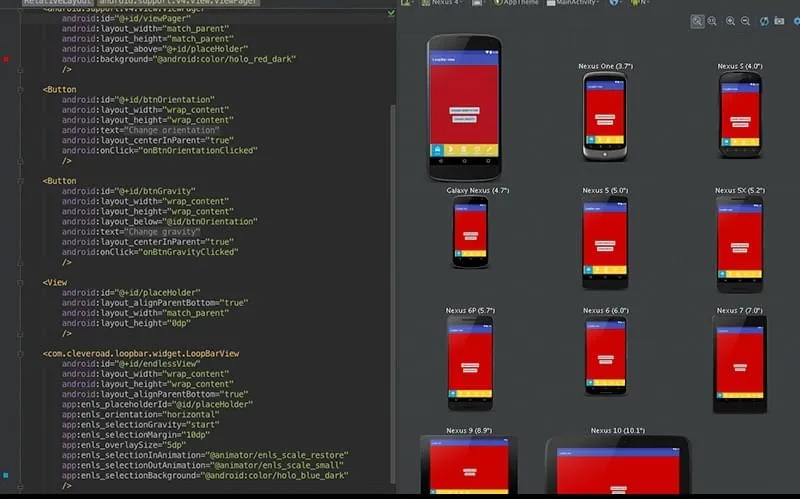
Android Studio layouts preview is supported. It means that the Loop Bar is made so that the Android Studio can correctly render it at once in a preview mode.
Usage
Insert the code below into the screen layout where you want to see Loop Bar and define the parameters as per your needs.
<com.cleveroad.loopbar.widget.loopbarview
   android:id="@+id/endlessView"
   android:layout_height="wrap_content"
   android:layout_width="match_parent"
   app:enls_orientation="horizontal"
   app:enls_overlaysize="5dp"
   app:enls_placeholderid="@id/placeHolder"
   app:enls_selectionbackground="@android:color/holo_blue_dark"
   app:enls_selectiongravity="start"
   app:enls_selectioninanimation="@animator/enls_scale_restore"
   app:enls_selectionmargin="10dp"
   app:enls_selectionoutanimation="@animator/enls_scale_small"
/>
Note that for using overlay feature you should set the following parameters: enls_overlaySize and enls_placeholderId
For the purpose of clarity, see the definition of attributes in the table below:
Attributes definition
enls_overlaySize
A size of the selected overlay view.
enls_placeholderId
View ID for layout usage. You can apply the above or other attributes of RelativeLayouts to increase the LoopBarView height. See more in the example.
enls_selectionGravity
The position of the widget view. It can be either vertical or horizontal. The default one is horizontal.
enls_selectionMargin
The margin of selectionView from bounds of view. The default one is 5dp.
enls_selectionInAnimation
The animation which follows the icon of the selected category appearing in the selectionView.
enls_selectionOutAnimation
The animation which follows the icon of the selected category hiding in the selectionView.
enls_selectionBackground
Selection background. The default one is #ff0099cc.
android:background
The Loop Bar view has yellow background by default. Use standard android:background attribute to change it. The default one is #ffc829.
To initialize items in widget and start working with it, you should setup adapter to it and add item click listener:
LoopBarView loopBarView = findViewById(..);
categoriesAdapter = new SimpleCategoriesAdapter(MockedItemsFactory.getCategoryItemsUniq());
loopBarView.setCategoriesAdapter(categoriesAdapter);
loopBarView.addOnItemClickListener(this);
Here, SimpleCategoriesAdapter is used. It requires the collection of ICategoryItem objects in order to draw the default view with icon and text. Also, you are free to use your own adapter with custom items.
To get more details about the Loop Bar project, please, visit GutHub.
Support
If some aspects of the Tool Bar usage are not quite clear or you have any questions concerning this topic feel free to contact our Support at with "LoopBar. Support request' subject. Also, you can get in touch our specialist in a live chat. Not to miss new fantastic projects, subscribe to our Dribbble.

Evgeniy Altynpara is a CTO and member of the Forbes Councils’ community of tech professionals. He is an expert in software development and technological entrepreneurship and has 10+years of experience in digital transformation consulting in Healthcare, FinTech, Supply Chain and Logistics
Give us your impressions about this article
Give us your impressions about this article